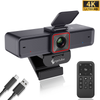
 Angetube 913
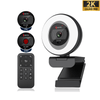
 Angetube 914pro
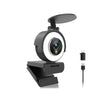
 Angetube 863plus
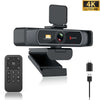
 Angetube 967Pro
 Angetube 862pro
 Angetube 920
 Angetube 628
 Angetube 963
 Angetube 827
 Angetube 962
 Angetube 967

To seamlessly integrate a webcam into your Mac's camera options, carefully follow these step-by-step instructions:
Connect the Webcam:
Begin by securely connecting the webcam to your Mac using the appropriate cable or connector.
Access System Preferences:
Open the "System Preferences" by clicking on the Apple menu in the top-left corner of your screen and selecting "System Preferences."
Navigate to Security & Privacy:
Within the System Preferences window, locate and click on the "Security & Privacy" icon.
Unlock Privacy Settings:
Head to the "Privacy" tab and click on the lock icon in the bottom-left corner. This action will allow you to make changes.
Administrator Password:
When prompted, enter your administrator password to authenticate the changes.
Camera Settings:
In the left sidebar of the Privacy tab, locate and click on "Camera" to access the camera settings.
Enable the Webcam:
Check the box next to the name of the connected webcam. This step enables the webcam for use with your Mac.
Complete the Process:
Finally, close the System Preferences window to complete the setup.
By diligently following these steps, your Mac should now seamlessly recognize the connected webcam. Enjoy using it as an option in various applications such as FaceTime, Photo Booth, or video conferencing apps.
Connecting a USB webcam to a Mac computer
Connecting a USB webcam to a Mac computer is a relatively simple process that lets you expand your webcam options to enhance your video conferencing or streaming experience. Here's a guide on how to add a webcam to your Mac's camera options:
- Check compatibility: Make sure the USB webcam you plan to use is compatible with your Mac computer. Most webcams are compatible
- Connect the webcam: Plug the USB webcam into an available USB port on your Mac. The operating system should automatically recognize the webcam.
- Adjust privacy settings: By default, when connecting a new device, macOS asks for permission to access the camera. If prompted, grant the webcam access to the Mac camera. 4.
- Test the webcam: Open a video conferencing or streaming application that supports an external webcam, such as Zoom, Skype, or OBS Studio. go to the application's settings and select the newly connected webcam as the default. Test the webcam by starting a video call or recording a video to make sure it is working properly. 5. Adjust the settings if necessary.
- Adjust settings if necessary: Depending on the webcam model, you may also need to adjust other settings such as resolution, frame rate or exposure. These settings can usually be accessed through the webcam's software or the application you are using.
Configuring Webcam Settings on a Mac Device
To add a webcam to the camera options on a Mac device, you can follow these steps to configure the webcam settings:
- Connect the webcam to your Mac using the appropriate cable or connector. Make sure the webcam is properly connected and recognized by your Mac.
- Open the "System Preferences" by clicking on the Apple menu in the top-left corner of your screen and selecting "System Preferences" from the drop-down menu.
- In the System Preferences window, locate and click on the "Camera" option. This will open the camera settings for your Mac.
- In the Camera settings, you should see a list of available cameras. If your webcam is properly connected, it should appear in this list. Select your webcam from the list.
- Once you have selected your webcam, you can adjust various settings such as brightness, contrast, and resolution. You can also choose whether to enable or disable the built-in microphone on the webcam.
- Test your webcam by clicking on the "Camera Preview" button. This will open a window showing the live feed from your webcam. Make sure the video and audio are working properly.
- If you want to use the webcam with specific applications, such as video conferencing software or video recording apps, you may need to configure the camera settings within those applications as well. Check the settings or preferences of the respective applications to ensure the webcam is selected as the default camera.
It's worth noting that the steps may vary slightly depending on the version of macOS you are using.
Choosing the Right Webcam for Your Mac Device
If you're looking to add a webcam to your Mac device, there are a few factors to consider to ensure compatibility and optimal performance. Here's a guide on how to add a webcam to your Mac camera options:
- Check compatibility: Before purchasing a webcam, make sure it is compatible with your Mac device. Look for webcams that explicitly mention Mac compatibility or have drivers available for macOS.
- Consider resolution and image quality: Look for webcams that offer high-resolution video and good image quality. Most modern webcams support at least 720p HD resolution, but if you require higher quality, consider models that offer 1080p or even 4K resolution.
- Look for built-in microphones: Many webcams come with built-in microphones, which can be convenient for video calls and online meetings. Ensure that the webcam you choose has a good quality microphone if audio is important to you.
- USB connectivity: Most webcams connect to your Mac device via USB. Make sure the webcam you choose has a USB interface that is compatible with your Mac's USB ports. USB 3.0 or higher is recommended for faster data transfer.
- Consider additional features: Some webcams offer additional features like autofocus, low-light correction, and adjustable field of view. These features can enhance your video quality and user experience.
- Software compatibility: Check if the webcam requires any specific software or drivers to work with macOS. Ideally, choose a webcam that is plug-and-play, meaning it works seamlessly with your Mac device without the need for additional software installation.
For Mac owners seeking high-quality webcams with Full HD resolution, digital zoom, and compatibility with streaming platforms like Zoom meetings, Google Meet, and video recording, consider HD webcams suitable for Mac computers, including Mac Studio and Mac Mini, ensuring excellent video and audio performance during video calls and streaming. Explore USB webcams designed for optimal Mac compatibility.


